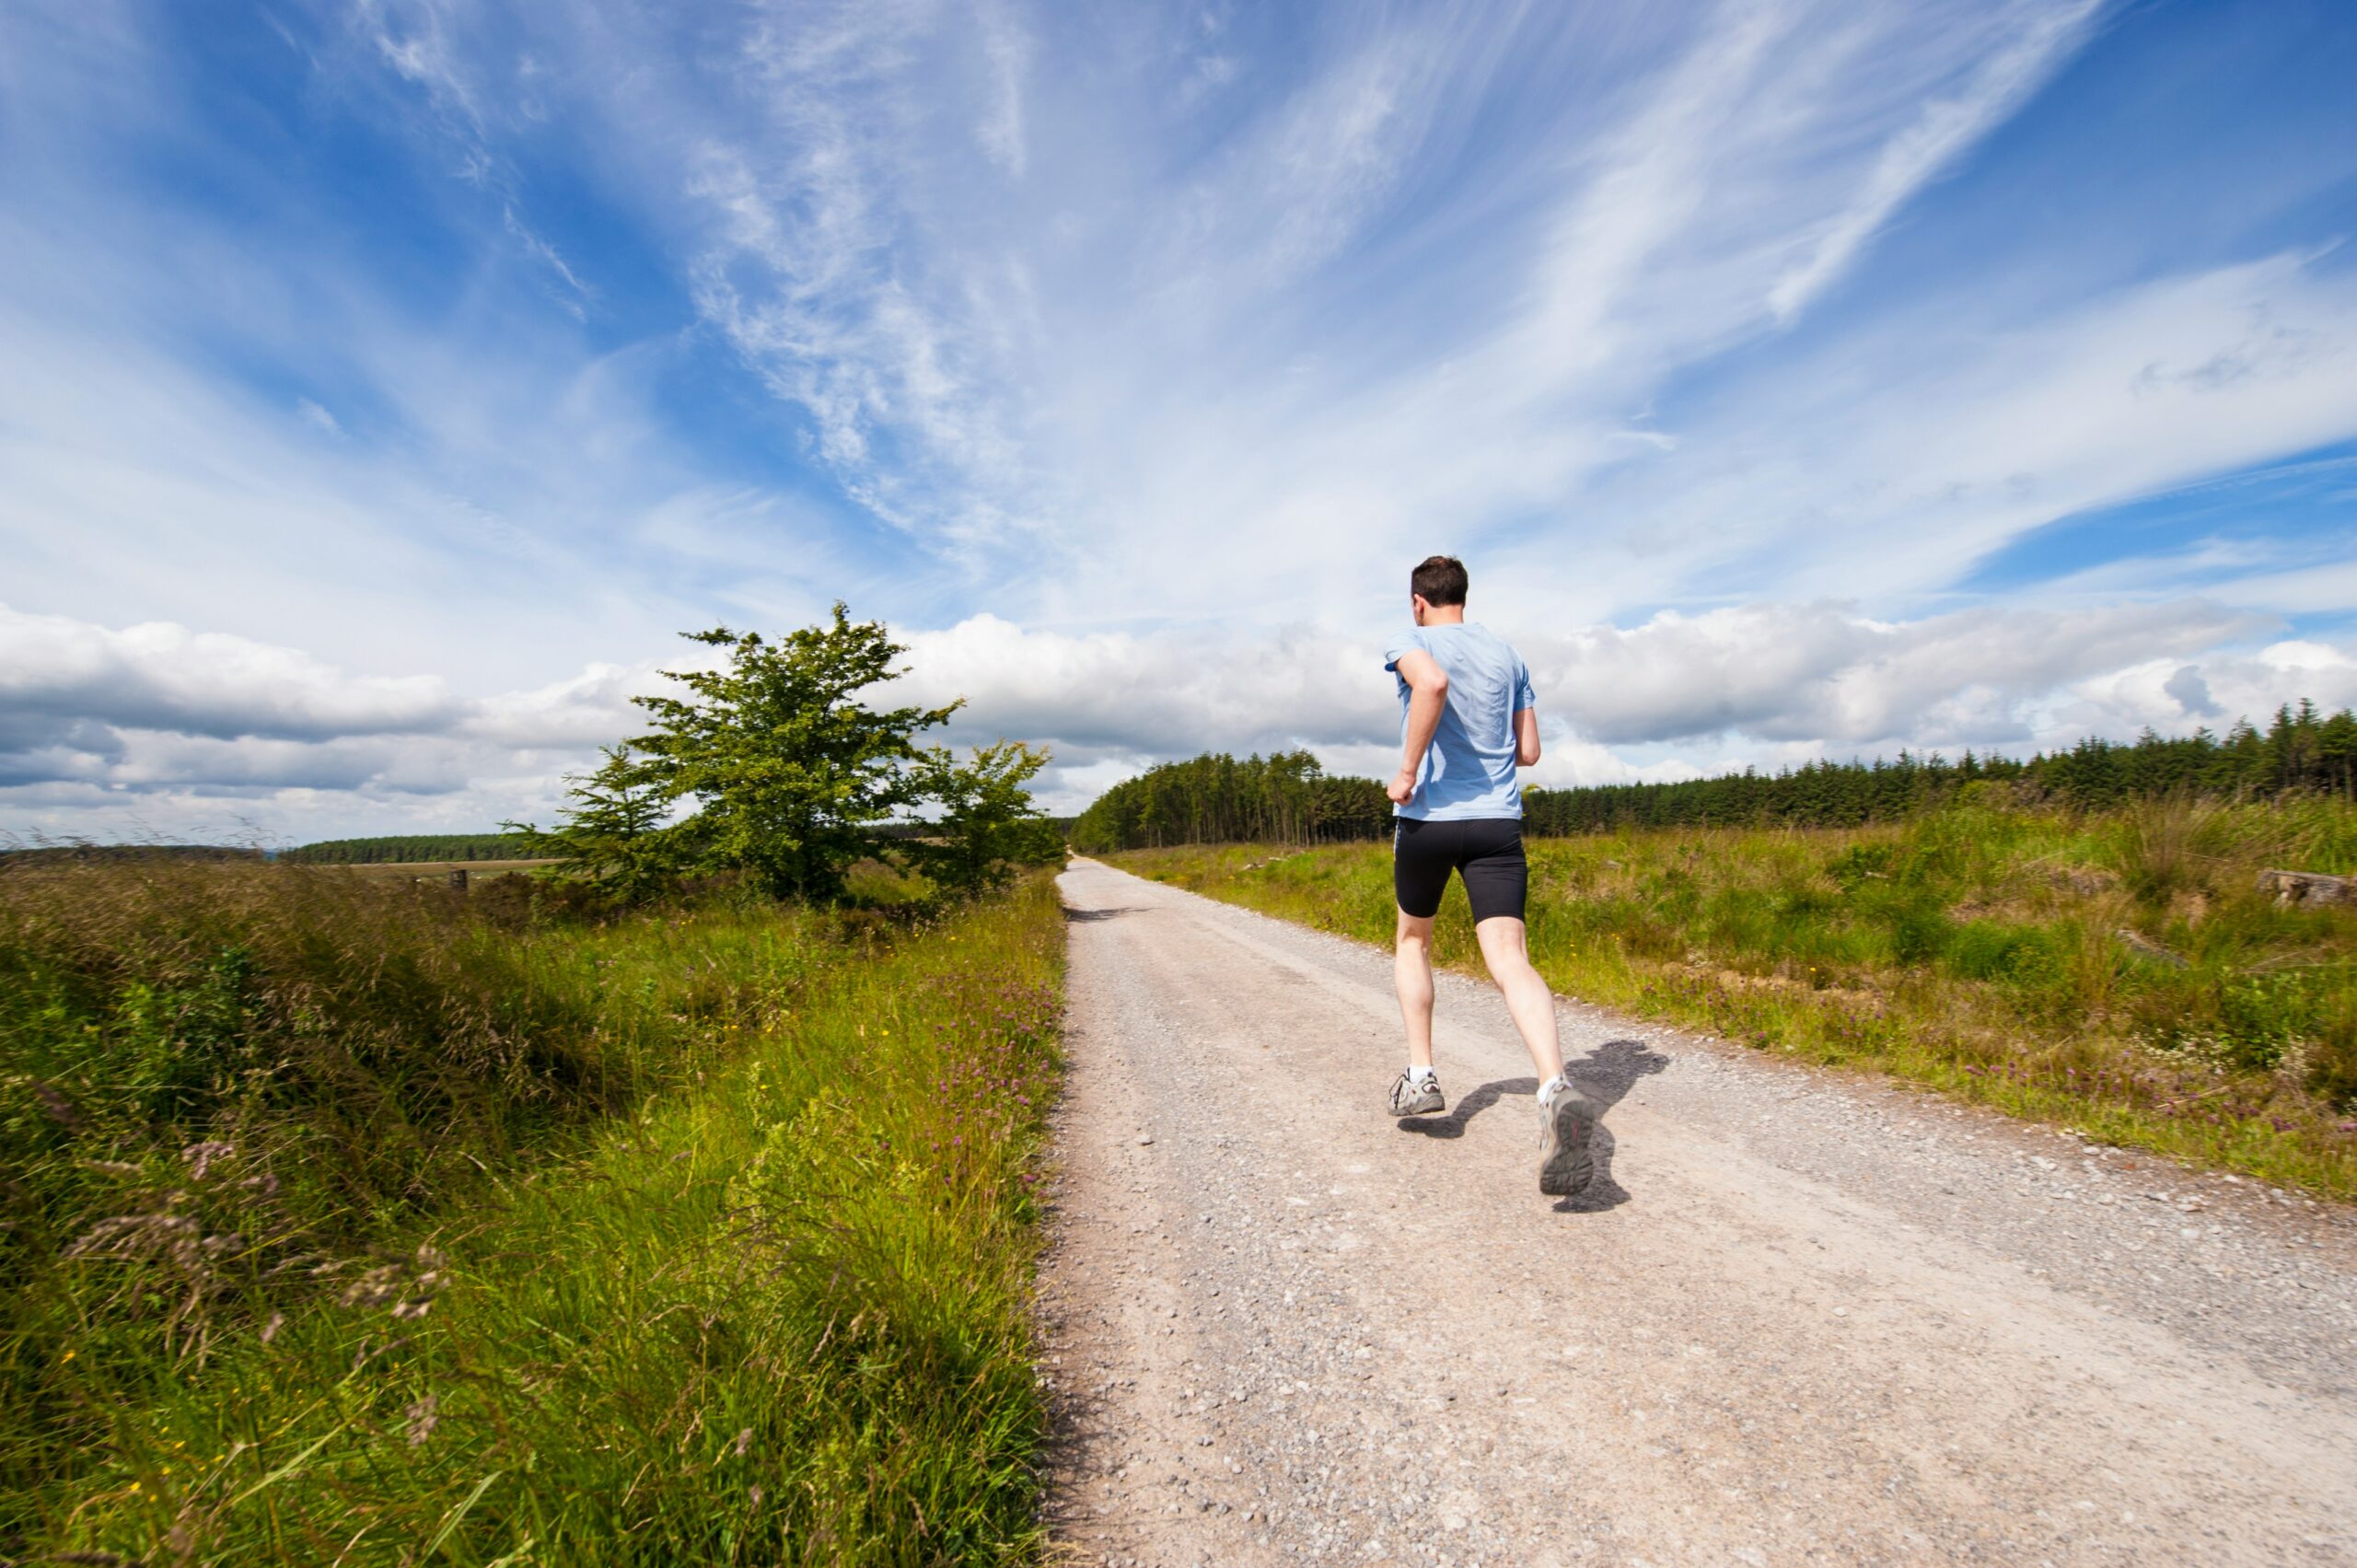
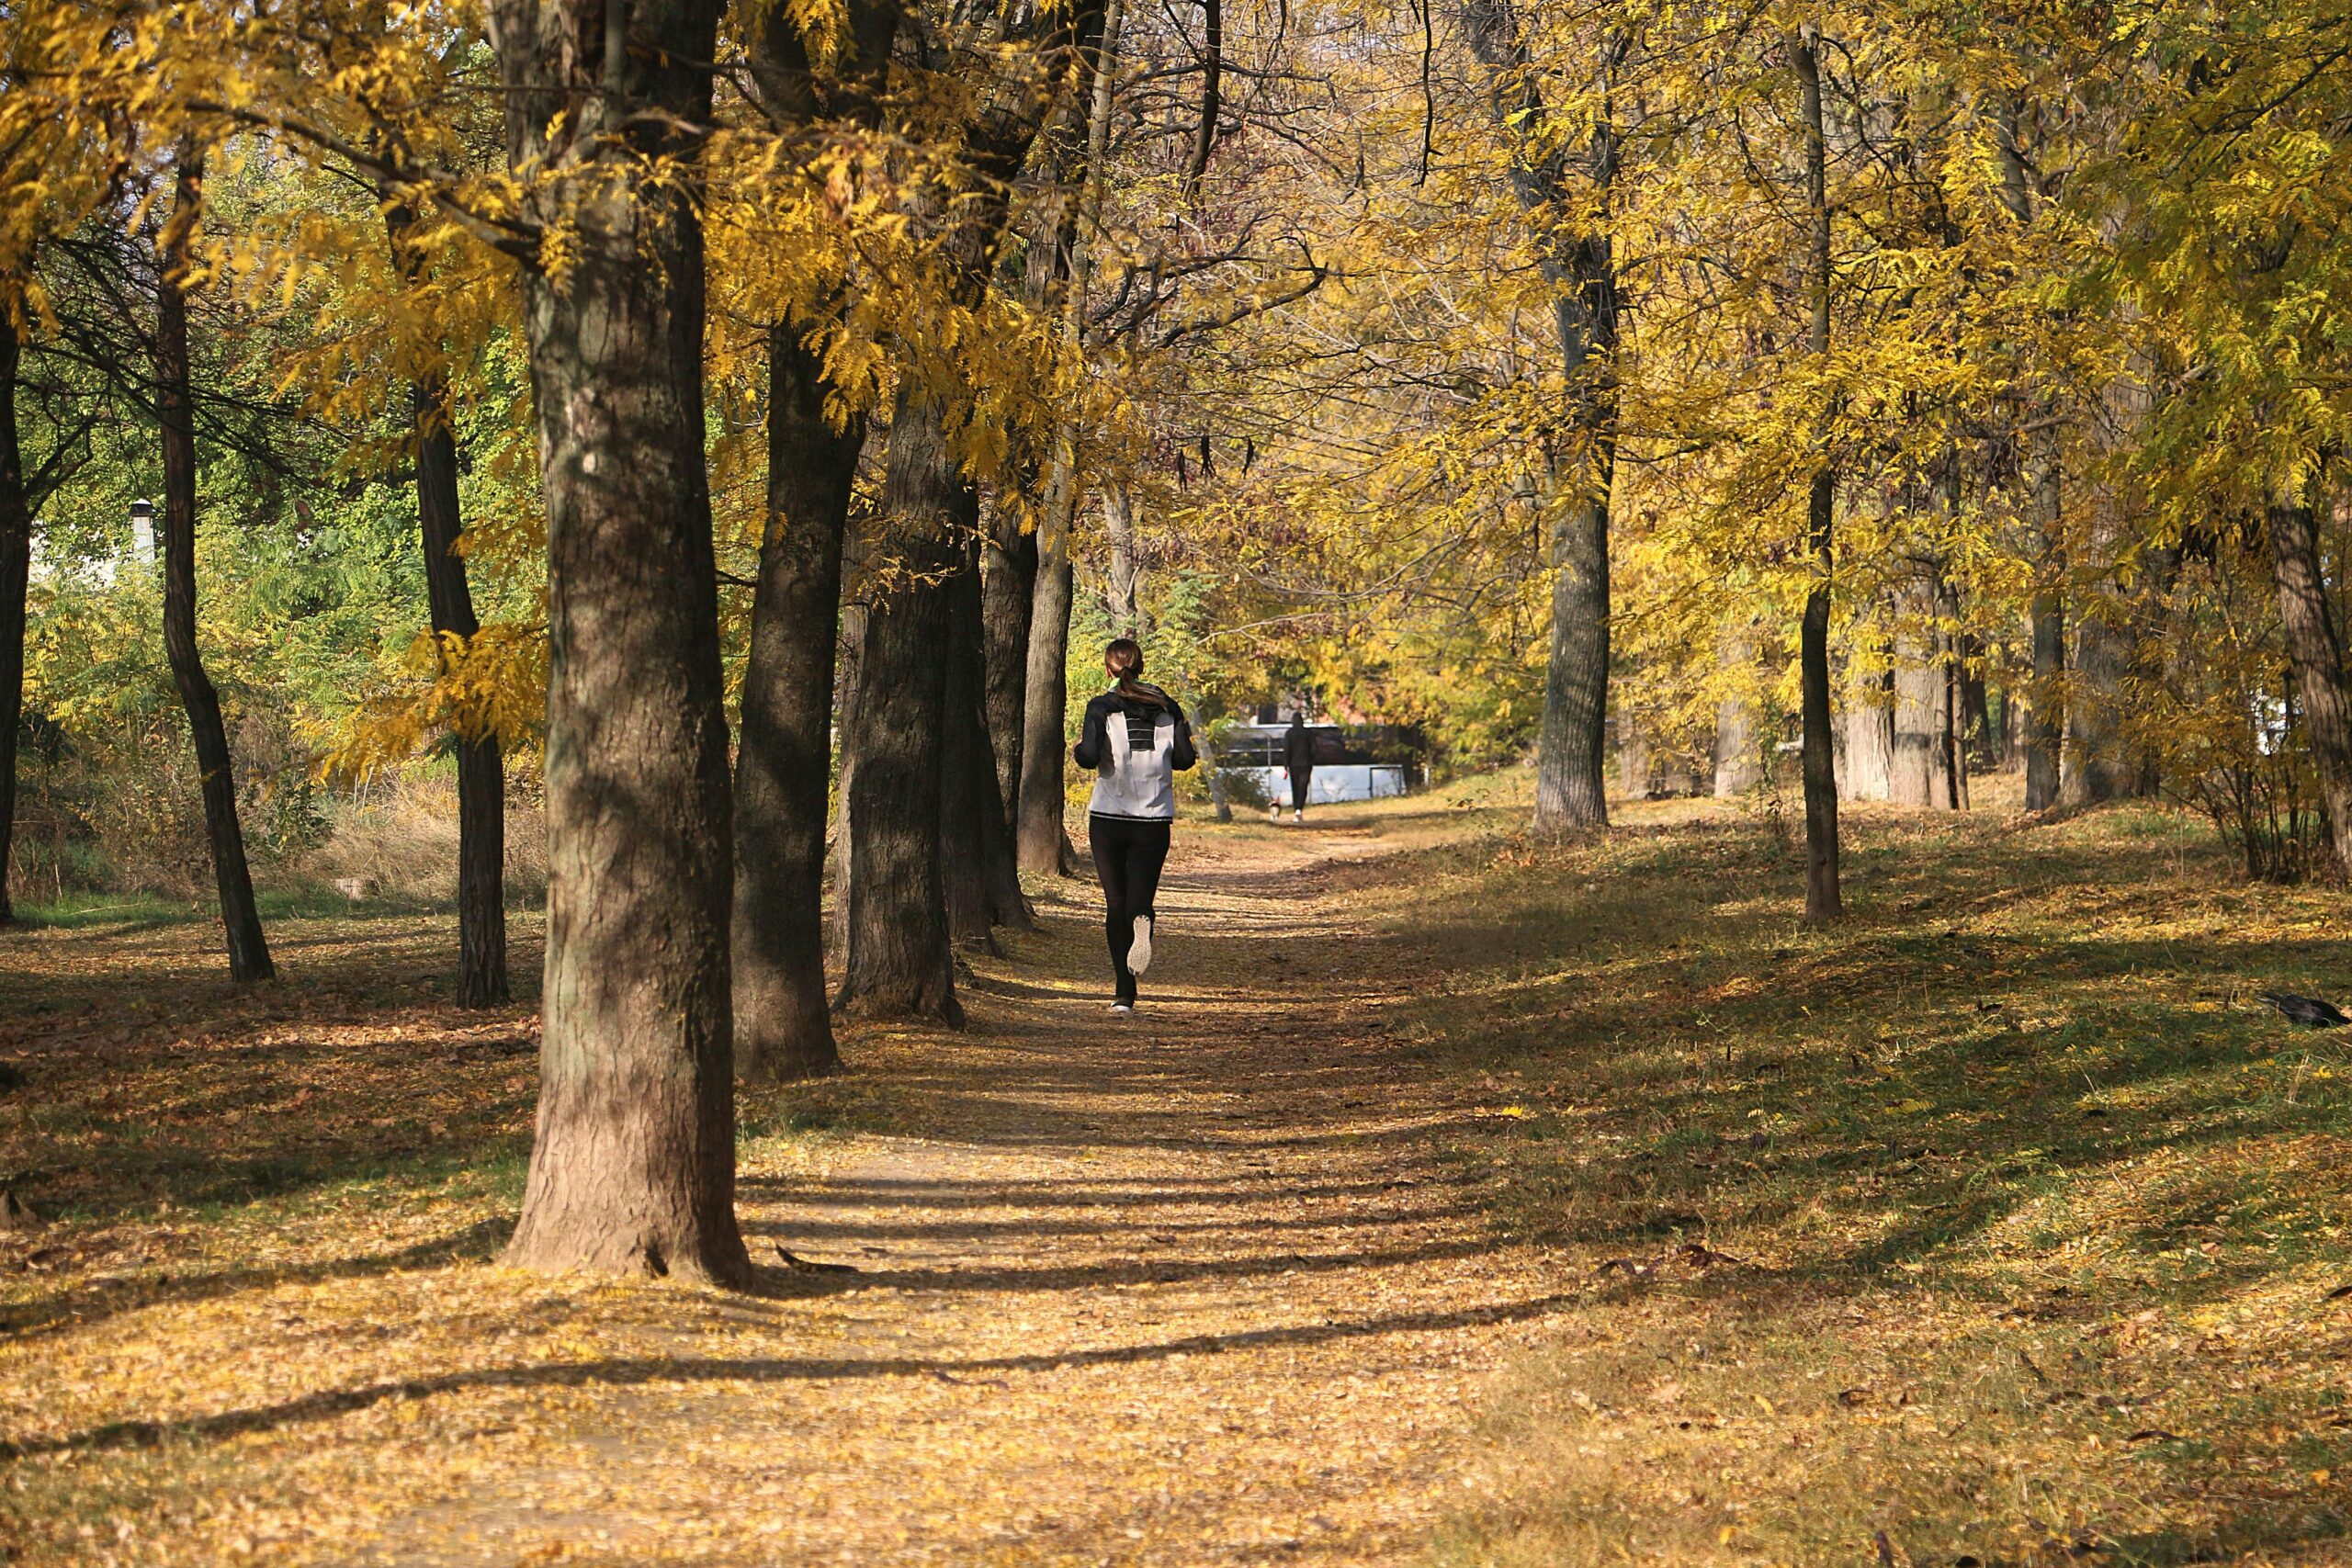
Spring sports and outdoor activities are here…tennis, pickleball, baseball, soccer, running, walking, hiking, golfing, etc. One of the most common injuries associated with physical activity, especially after a sedentary winter or change in temperature is a “pulled hamstring.” This painful injury is not only for the weekend warrior. Well-trained, healthy and fit professional athletes often have their season interrupted for weeks and months due to a hamstring injury. What is the hamstring? How is it injured? What is the best treatment?
Hamstring Strain:
A hamstring strain is a tear of the muscle fibers of the muscle group in the back of the thigh called the hamstring. The hamstring muscle is a group of three muscles that run from the back of the hip (lower pelvis), crossing the back of the knee and attaches to the knee bone (tibia). The hamstring muscles work to extend the hip and bend the knee during running and walking activities. They are very active when an athlete changes direction, especially forwards and backwards or decelerating. This injury, like others muscle strains, varies in intensity.
Severe hamstring strain occurs when many muscle fibers are torn. The athlete may experience a sudden onset of severe pain in the back of the thigh and occasionally report a popping sensation. Pain, swelling and black and blue skin from tissue damage and bleeding is often reported. Also, pain is reproduced when attempting to bend the knee. In very severe cases, the boney attachment can be pulled so strongly that a small fracture can occur. Healing time can be as short as a few days or as long as weeks or even months.
The Most Common Causes of a Hamstring Strain:
Overuse – every time the knee is bent the hamstring muscles must contract. If there is not adequate time allowed for rest between workouts or competition, then the muscles may be fatigued and become vulnerable to injury. Also, overuse of the same muscles without rest may make them irritated and inflamed.
Inadequate Warm-up – a warm muscle stretches like a piece of gum warmed up in your mouth. When you pull the warm gum, it stretches. However, if you drink an ice cold drink with gum in your mouth and then stretch the gum, it will tear instead of stretch. A good warm-up will prevent tearing and prepare the nervous system for sudden movements and changes in direction.
Sudden Movement – quick sprint, sudden change in direction, quick turn with an unexpected force or slip.
Poor Body Mechanics – especially when moving or lifting a heavy load away from your center of gravity.
Forceful Contact or Loss of Traction – when a leg is forced away from the body by an outside force (tackle in football) or slip on grass or ice.
Diagnosis:
Your family physician will examine the back of your leg to determine if you have hamstring strain. Sometimes, pain in the buttocks and back of the leg can be referred from your lower back if the sciatic nerve is inflamed. In more advanced cases, you may be referred to an orthopedic surgeon for further examination and treatment. An X-ray, MRI or bone scan will show the extent of the tear and if the bone is involved. The diagnosis will determine if your problem is minor, moderate or severe.
Treatment:
There are many conservative options. Your family physician or orthopedic surgeon will help you decide which choices are best.
Anti-inflammatory Medications: such as aspirin, acetaminophen or ibuprofen to reduce pain and swelling.
Orthopedic Physical Therapy: such as heat, cold, ultrasound, electrical stimulation, joint mobilization, massage, range of motion exercises, strengthening exercises, and supportive compression strapping. Once pain free, a preventative training program is essential to prevent reinjury.
Activity Modifications: if it is not the week of the district tournament, rest, avoid running or stretching/stressing of the thigh muscles.
Supportive Devices: such as thigh wraps or sleeves, compression shorts (like those worn under basketball shorts) can provide compression and relief.
Prevention:
Recent studies have determined that a training program specifically designed to prevent hamstring injuries is effective, especially for the competitive athlete. This program includes:
High Intensity Training- regardless of the speed of your sport, high intensity, interval anaerobic training is critical. Interval sprints are the best example.
Simulate the Demands of the Sport – when training, simulate the specific demands of your sport… “train the way you play.” For example, in football, the average play lasts 7-10 seconds. Therefore, sprint on a count from the line of scrimmage for 7-10 seconds. First, sprint in a straight line. Then, sprint and cut at 3-5-10 yards. Then, sprint, cut and spin. Then, sprint figure 8’s.
Weight Train for Power and Strength/Weight Train for Speed and Endurance- traditionally, weight training is performed with high weights and low repetitions to increase power and strength and both arms or both legs are used at the same time. However, to prevent hamstring injuries, add a few sets of speed/coordination training by performing lifting with low weights and high reps. Also, alternate right and left legs to simulate normal walking speed.
Weight Training Using Negatives/Eccentrics – weight training with a concentration on lowering the weight against gravity, not raising it.
Exercise All Muscle Groups – of the lower body, not just the quads and hams. Include: Hip flexion, extension, abduction, adduction, internal & external rotation
Knee: flexion, extension
Ankle: flexion, extension, inversion, eversion
Warm -Up: a pregame slow jog or exercise bike and/or massage to the area to warm up the muscles prior to activity.
Stretching: Indian sit stretch, Hurdler stretch, Lying hamstring wall stretch
Strengthening Exercises: weight training for legs, including inside and back leg muscles, use weights or resistance tubing for leg curls and hip extensions.
Agility Drills: figure 8, cross-over, tire or disc running
Compression Shorts: like those worn under basketball shorts
Cool Down: use ice to the effected area after exercise or sport
SOURCES: Journal of Physical Medicine & Rehabilitation and American Academy of Orthopaedic Surgeons
Visit your doctor regularly and listen to your body.
EVERY MONDAY – Read Dr. Paul J. Mackarey “Health & Exercise Forum!” via Blog
EVERY SUNDAY in "The Sunday Times" - Read Dr. Paul J. Mackarey “Health & Exercise Forum!” in hard copy
This article is not intended as a substitute for medical treatment. If you have questions related to your medical condition, please contact your family physician. For further inquires related to this topic email: drpmackarey@msn.com
Paul J. Mackarey PT, DHSc, OCS is a Doctor in Health Sciences specializing in orthopedic and sports physical therapy in Scranton and Clarks Summit. Dr. Mackarey is in private practice and is an associate professor of clinical medicine at Geisinger Commonwealth School of Medicine. For all of Dr. Mackarey's articles, visit our exercise forum!
NEPA has had its share or snow this winter…and the recent storm added plenty of the pretty white stuff for work and play. Much has been written about the dangers of snow shoveling for your heart. However, while not fatal, low back pain is the most common injury sustained while shoveling snow. Heart attacks are also more common following wet and heavy snow.
Snow shoveling can place excessive stress on the structures of the spine. When overloaded and overstressed, these structures fail to support the spine properly. The lower back is at great risk of injury when bending forward, twisting, lifting a load, and lifting a load with a long lever. When all these factors are combined simultaneously, as in snow shoveling, the lower back is destined to fail. Low back pain from muscle strain or a herniated disc is very common following excessive snow shoveling.
Snow Shoveling as a Form of Exercise:
GOOD - For the Young and Healthy – studies show that snow shoveling for 15 minutes is considered moderate physical activity and extreme and vigorous physical activity when performed more than 15 minutes even for young healthy college students.
BAD – For the Older and Unfit – research clearly shows that there is a significant increase in heart attacks among snow shovelers. If you have any risk factors or medical condition and do not exercise regularly consult your physician.
Cold Weather – makes this activity even more difficult and physically stressful. Cold air makes breathing more labored and difficult and cold temps create added strain on the body.
People at High Risk of Illness Due to Snow Shoveling:
History of Heart Attack
History of Heart Disease
History of High Blood Pressure or High Cholesterol
Smokers
Inactive & Sedentary Lifestyle
Overweight
Elderly
10 TIPS FOR SAFE SNOW SHOVELING:
MEDICAL CLEARANCE: If you have any medical condition or risk factors consult your physician.
PAIN: Stop immediately if you experience any pain. Especially in the chest, left arm, jaw, face, neck, or lower back.
ERGONOMICS: Choose a snow shovel that is right for you:
An ergonomic shovel with a curved handle allows you to keep your back straighter or arched when shoveling
An ergonomic shovel with a shorter or adjustable handle length allows you to keep your back straighter and knees bent when shoveling. The right handle length allows you to arch your back 10 degrees with your knees slightly bent when the shovel is on the ground.A plastic shovel blade is lighter than a metal one and will be better for your spine.
A smaller blade is better than a larger blade. It may take longer but will stress your back less.
PUSH: When possible, push the snow. Do not lift it. Lifting is much more stressful on the spine. You can find shovels that are ergonomically designed just for pushing snow.
WARM – UP: Be sure your muscles are warm before you start to shovel. Cold and tight muscles are more likely to strain than warm, relaxed muscles. Layer and consider compression shirts or tights can help prevent cold and tight muscles.
LEVERAGE: When you grip your shovel, spread your hands at least 12 inches apart. This will improve your leverage and reduce strain on your lower back.
TECHNIQUE: Shoveling technique is very important. The American Academy of Orthopaedic Surgeons recommends:
Squat with your legs apart, knees bent and back straight.
Lift with your legs. Do not bend at the waist.
Scoop small amounts of snow into the shovel and walk when you want to dump it.
Do not hold the filled shovel with outstretched arms.
If snow is deep, remove in piecemeal, a few inches at a time.
Rest and repeat as necessary.
Move your feet and do not twist your back as you shovel or dump. Never throw snow over your shoulder
CAUTION: Be cautious shoveling wet snow. One full shovel can weigh 25 pounds.
Shovel wet snow slowly in piecemeal.
PACE YOURSELF: Take frequent breaks and stretch your back in the opposite direction of shoveling. For example: 1. Lean backwards and extend your lower back. 2. Pinch your shoulder blades together.
TECHNOLOGY:
Snow Blower - Use a self-propelled snow blower. It will put much less stress on your lower back than shoveling snow if used correctly. For example, push the blower with your legs and keep your back straight or arched and knees bent.
Ergonomic Shovels:
Rechargable Electric Snow Shovel: Toro, DeWalt, Voltask
2 Handle Shovels: ErgieShovel or Snow Joe ShovelutionPush Shovels: Garant Yukon or Garant Sleigh Shovel
WarmlyYours - HeatTrak® portable snowmelting system for roofs, gutters, driveways, sidewalks, stairs and handicapped ramps uses electric mats or runners for home or office which can be customized.
Sources: The Colorado Comprehensive Spine Institute; American Academy of Orthopaedic Surgeons
Visit your doctor regularly and listen to your body.
EVERY MONDAY – Read Dr. Paul J. Mackarey “Health & Exercise Forum!” via Blog
EVERY SUNDAY in "The Sunday Times" - Read Dr. Paul J. Mackarey “Health & Exercise Forum!” in hard copy
This article is not intended as a substitute for medical treatment. If you have questions related to your medical condition, please contact your family physician. For further inquires related to this topic email: drpmackarey@msn.com
Paul J. Mackarey PT, DHSc, OCS is a Doctor in Health Sciences specializing in orthopedic and sports physical therapy in Scranton and Clarks Summit. Dr. Mackarey is in private practice and is an associate professor of clinical medicine at Geisinger Commonwealth School of Medicine. For all of Dr. Mackarey's articles, visit our exercise forum!
Pediatricians and the American Academy of Pediatrics Recommend Parents Use Good Judgment
The American Academy of Pediatrics (AAP) cited studies suggesting that heavy use of electronic media may interfere with children’s speech and language development replace important playtime with parents and lead to obesity. Studies also have found that more than 90 percent of U.S. kids have used mobile devices and most started using them before age 1. The pediatricians’ group recommends no screen time for children up to age 2. Moreover, they recommend total screen time, including TV and computer; use should be less than one hour daily for ages 2 and older. Pediatricians don’t want parents to overreact. They understand that a little screen time on occasion is not likely to harm a child, especially if they are typically active and creative most of the day.
Dramatic increases in virtual education and toys powered by artificial intelligence (AI) make purchasing toys even more challenging. This may be the year to consider safe and appropriate gifts that promote physical activity. The academy’s website offers suggestions on ideal toys for young children, including balls, puzzles, coloring books and card games. Visit: AAP.org or HealthyChildren.org, the official parenting website of the AAP.
American Academy of Pediatricians Toy Recommendations:
Giving gifts to children is a favorite part of the holidays, whether they're wrapped under a tree or exchanged with the lighting of a candle. When choosing a toy for a child, the American Academy of Pediatrics recommends the toy be appropriate for the child's age and stage of development. This makes it more likely the toy will engage the child – and reduces the risk it could cause injury. Below are some additional tips from the AAP on toy selection and safety:
Appropriate: Select toys to suit the age, abilities, skills and interest level of the intended child. Toys that are too advanced will frustrate your child and may pose safety hazards for younger children.
Developmental: When choosing gifts for babies and toddlers, consider toys that will build developmental skills. Toys that can be manipulated, such as shape sorters, stacking blocks, and baby-safe puzzles, are great for developing fine motor, cognitive, and perceptual skills. For more tips on choosing toys for babies, visit HealthyChildren.org “toy selection.”
Purpose: If you are considering a digital device for a child or teen, such as a tablet, smart phone or game system, think about the purpose of the device and the rules you want to set around its use. For more information, see these tips on HealthyChildren.org “mindful technology use” and “digital media use for young children.”
Batteries/Magnets: Be cautious about toys containing button batteries or magnets. Children can have serious stomach, throat and intestinal problems – including death – after swallowing button batteries or magnets. In addition to toys, button batteries may be in musical greeting cards, remote controls, hearing aids, and other small electronics. Small, powerful magnets may be part of building toy sets. Keep button batteries and magnets away from young children and call your health care provider immediately if your child swallows one.
Electrical: To prevent burns and electrical shocks, do not give children under age 10 a toy that must be plugged into an electrical outlet. Instead, buy toys that are battery-operated.
Small Pieces: If you are buying a gift for a young child, look for toys without small pieces. Young children can choke on small parts contained in toys or games. Government regulations specify that toys for children under three cannot have parts less than 1 1/4 inches in diameter and 2 1/4 inches long. For more: HealthyChildren.org “how to buy safe toys.”
Balloons: Children can choke or suffocate on broken or uninflated balloons. Do not allow children under age 8 to play with them.
Ribbons/Strings: Remove tags, strings, and ribbons from toys before giving them to young children. Watch for pull toys with strings that are more than 12 inches long, because they could be a strangulation hazard for babies.
Read the Label: When your child receives a gift, be sure to read the label and instructions. Warning labels give important information about how to use a toy and what is the appropriate age. Be sure to show your child how to use the toy.
Storage: Parents should store toys in a designated location, such as on an open shelf or in a bin, and keep older kids' toys away from young children. If you use a toy box, choose one with no lid or a lightweight, non-locking lid and ventilation holes. Visit: HealthyChildren.org “toy box safety.”
Artificial Intelligence: Toys powered by AI chatbots which interact with children are often inappropriate. For example, these chatbots can talk in depth about sexually explicit topics and inform listeners where to find knives and matches.
SOURCE: American Academy of Pediatrics (AAP); healthychildren.org
EVERY MONDAY – Read Dr. Paul J. Mackarey “Health & Exercise Forum!” via Blog
EVERY SUNDAY in "The Sunday Times" - Read Dr. Paul J. Mackarey “Health & Exercise Forum!” in hard copy
This article is not intended as a substitute for medical treatment. If you have questions related to your medical condition, please contact your family physician. For further inquires related to this topic email: drpmackarey@msn.com
Paul J. Mackarey PT, DHSc, OCS is a Doctor in Health Sciences specializing in orthopedic and sports physical therapy in Scranton and Clarks Summit. Dr. Mackarey is in private practice and is an associate professor of clinical medicine at Geisinger Commonwealth School of Medicine. For all of Dr. Mackarey's articles, visit our exercise forum!
More than 65 million people, almost 30% of the population in the United States, are actively involved in providing 20 or more hours of care for a chronically ill, disabled, or aged family member or friend each week. As our population continues to age, this number is expected to grow rapidly.
The role of a caregiver is multifaceted and often involves tasks and skills beyond the education or comfort level of most providers. Some examples include; managing money, paying bills, shopping, cleaning, maintaining and repairing a home, dispensing and injecting medications, cleaning wounds, changing dressings, catheter management, bed baths, assisting in position changes, transferring from the bed to the chair, ambulation, stair climbing, bathroom assistance for toileting and showering and many other responsibilities. Consequently, a caregiver is often at risk for mental, spiritual and physical fatigue or breakdown. It is no surprise that depression, illness and injury often plague a caregiver and eventually, the caregiver is in need of a caregiver. One of the most common injuries suffered by a caregiver is back pain.
Lower back pain (LBP) is one of the most common problems in our society. Over 90% of all Americans will suffer from it at least once in their lives. It is generally agreed that prevention is the best treatment for LBP.
TIPS FOR THE PREVENTION OF BACK PAIN FOR THE CAREGIVER:
Maintain Health & Fitness Level
As little as 10 extra pounds puts great stress on your lower back. It also makes it more difficult to maintain good posture. Eat well and exercise regularly.
Aerobic Exercise
Aerobic exercise will help prevent weight gain and stiffness for a healthier lower back. It will also help with the stress and depression associated with providing care for a loved one. Perform mild aerobic exercise such as walking 3-5 times per week for 30-45 minutes. You can also use an elliptical or bike at home while your loved one is resting. Get outdoors and take multiple short walks …go around the block a few times per day.
Core Exercises
Core stabilization exercises designed to strengthen the abdominal and lower back muscles will help prevent injury. Some examples of core exercises are:
Pelvic Tilt - lying on your back and performing a pelvic tilt as you flatten you lower back into the floor.
Pelvic Tilt and Heel Slide - lying on your back, hold a pelvic tilt as you slide your one heel up and down and repeat with the other heel.
Core on Ball - Perform arm exercises such as biceps and triceps with light weight while sitting on a therapeutic ball while simultaneously trying to hold an isometric contraction of your abdominal and lower back muscles.
Do Not Smoke
Smoking effects natural healing because it constricts the small blood vessels. Smokers have a much higher incidence of LBP and failure from lower back surgery.
Practice Good Posture & Body Mechanics
Good posture is critical for a healthy back. When sitting, standing or walking maintain a slight arch in your lower back, keep shoulders back, and head over your shoulders. In sitting, use a towel roll or small pillow in the small of the back.
Caregivers spend much of the day with their spine bent over a bed or chair feeding, bathing, and lifting a loved one. Postural exercises are designed to stretch your back in the opposite direction of this forward flexed position. Examples include:
Chin Tucks - tuck your chin back to bring head over shoulders.
Shoulder Blade Pinch - pinch your shoulder blades together.
Standing Arch - while standing put your hands behind back, extend lower back 10-20 degrees.
Perform slowly, hold for 3-5 seconds and repeat 6 times each 6 times per day.
Ergonomics
Sitting - When sitting, use an ergonomic work station and chair with a lumbar support and adjustable heights. Get close to your desk, keyboard and monitor.
Driving - If you drive long distances, use a lumbar support to keep an arch, sit close to your steering wheel to prevent bending forward.
Bending – Get an adjustable bed and raise it to a comfortable height when feeding, dressing or bathing your loved one.
Lifting - Think twice. First bend your knees and arch your back. Then, brace your abdominal muscles. Bend your spine forward as little as possible to lift the patient.
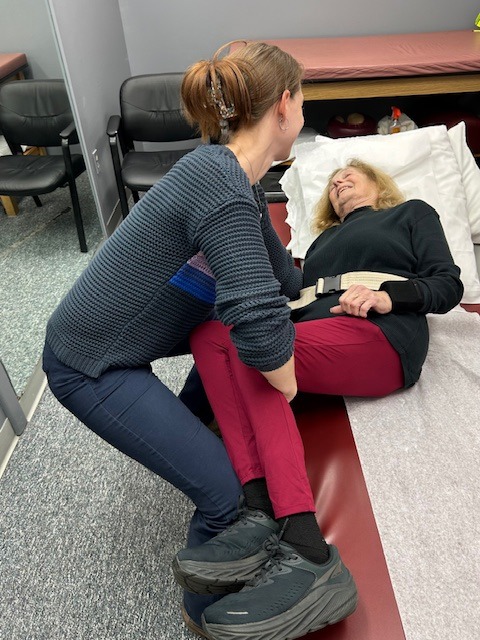
From Lying to Sitting in Bed - Bend your knees, maintain an arch in the back with head up, and bend over as little as possible. Bend the knees of your loved one; roll their trunk toward you to get their legs over the edge of the bed as you pivot their weight on their butt to get them sitting upright.
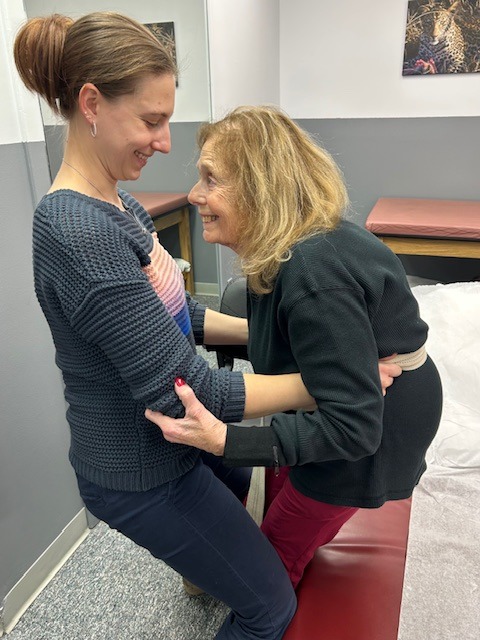
From Sitting in Bed to Sitting in Chair - Bend your knees, maintain an arch in the back with head up, and bend over as little as possible. Place your hands around the waist or on a transfer belt. Use your legs, turn with feet, and do not twist spine. Block the feet and knees of your loved-one with your feet and knees and use them to pivot and transfer from the bed to the chair. Be sure the chair is along side of the bed and arm of chair removed if possible before the lift.
Transfer Belt - Use a transfer belt around the waist of the patient. Grip the transfer belt, instead of the patient or clothing, during the lift or when ambulating.
Lower Back Lifting Belt - Also, if you have a back problem, consider using a lifting belt or back brace to protect your back when lifting the patient. Immediately following the lift, stand up straight and stretch lower back into extension.
Transfer belts and lower back lifting belts can be found online or at your local pharmacy.
Lift Chair – For patients that require maximum or moderate assistance and only one caregiver is available to lift or transfer, an electric lift chair should be considered.
EVERY MONDAY – Read Dr. Paul J. Mackarey “Health & Exercise Forum!” via Blog
EVERY SUNDAY in "The Sunday Times" - Read Dr. Paul J. Mackarey “Health & Exercise Forum!” in hard copy
This article is not intended as a substitute for medical treatment. If you have questions related to your medical condition, please contact your family physician. For further inquires related to this topic email: drpmackarey@msn.com
Paul J. Mackarey PT, DHSc, OCS is a Doctor in Health Sciences specializing in orthopedic and sports physical therapy in Scranton and Clarks Summit. Dr. Mackarey is in private practice and is an associate professor of clinical medicine at Geisinger Commonwealth School of Medicine. For all of Dr. Mackarey's articles, visit our exercise forum!
Guest Author: Paul Mackarey, Jr. PT, DPT is clinic director and partner at Mackarey & Mackarey Physical Therapy Consultants, Scranton and Clarks Summit, PA.
The 2025 Pennsylvania rifle deer season begins November 30th and continues through December 13, 2025. Opening day is considered a holiday in the state of Pennsylvania as approximately 750,000 hunters from age 12 to seniors (including myself) will hike through the woods in search of a whitetail.
I am a whitetail, turkey, small game hunter, and an avid outdoors enthusiast with great passion for mountain biking, kayaking, hiking and mountain climbing in our state and national parks. After an extended period away from hunting (in the off season), I am eager to be back in the woods. When possible, I try to make time to shed hunt and scout in preparation for the upcoming season. While I am active during the summer, I am not necessarily in “hunting shape” and certainly not acclimated to cold, wet and windy conditions. I offer health and safety tips for hunters based on the knowledge of experts in the field and my expertise as a health care provider. Good luck and be safe!
Common Health Problems for Hunters:
Chest Pain/Shortness of Breath – overweight and deconditioned people must be very careful when overexerting themselves in the woods while hunting. This is especially true for those with a history of heart disease. Make sure you take your medication and drink plenty of fluids 24 hours before and while hunting. Eat a good breakfast with a balance of protein and carbohydrates. A bagel with peanut butter is a good quick start. Pack healthy snacks and water to sustain you.
Knee Pain- in the front of the knee or kneecap is common with hunting. This can happen from excessive hiking on uneven or hilly terrain in the woods, especially if there is weakness in the leg muscles. When walking downhill try this simple trick to keep your knees safe. Slightly bend at the knees and bring your buttock back so your knees stay over (or slightly behind) your toes to reduce stress on the joint.
Neck, Lower or Middle Back Pain- can be caused by prolonged hiking with a heavy load or prolonged sitting in a tree stand in slouched positions, especially if one has tight hamstrings. Field dressing and carrying the deer out of the woods is also very stressful on the back. Take multiple breaks and stretch backwards, (the opposite direction of bending over to drag the deer). Also, consider where you want to position your hunt, avoid large hills that you may have to drag the deer up on the way out.
Shoulder Pain- can occur from recoil of a gun shot or the overhead activity of climbing a tree.
Hamstring Pain- can occur if the muscle is tight or weak. Prolonged walking, bending over and large steps over fallen trees can contribute to this problem. When free walking in the woods, look for the path of least resistance.
Ilio-Tibial Band Pain- when walking on the side of a hill there is a difference in the length of the legs. Overtime, this can lead to pain on the outside of the hip and leg.
Foot Numbness or Pain- can occur from prolonged squatting or poor fitting shoes/boots. However, lower back pain can also be associated with these symptoms.
Hand Numbness or Pain- can be caused by repeated recoil of the gun on the shoulder. Also, this may be associated with prolonged pressure of a shoulder strap or leaning on something under the arm.
Preparing Your Body for Hunting:
Prevention is the best management of most musculoskeletal and safety problems associated with hunting. First, one can prevent many of the above problems through proper fitting of equipment, clothing and shoes/boots.
Fitness - Be sure to maintain a fairly good fitness level in order to hunt safely. Begin an exercise and walking program 2-3 months before hunting season. If you are a beginner, start slowly. Warm up and slowly walk for 10 to 15 minutes and build up over time. Slowly add hills to your walking program.
Clothing - Wear your hunting clothing, such as boots to break them in while walking for exercise. Drytech clothing instead of cotton can keep you warm and wick moisture away from the body.
Move & Stretch - As hunters, we sit in our stand or blind and stay still for long periods of time in cold temperatures. This results in a cold and stiff body. When leaving your setup, give your body time to wake up before you start hiking out. Bend the knees or perform small squats repeatedly to get blood and warmth back into the legs. Stretch your spine backwards (the opposite of sitting) to prepare your spine for your heavy pack and do some heel raises for the ankles.
Strength Exercises - Work on the strength and flexibility of the quadriceps, calf and gluteal muscles. Instead of using the elevator, climb stairs throughout the day to work these muscles. Be careful not to progress too quickly because a drastic change from inactivity to over activity in a short period of time can create problems.
Be Aware - Know your limitations and adapt to them. Injuries most commonly occur when we overestimate what our body can do or choose to push through pain. Listen to your body, if you have pain, stop and modify your activity. In addition, scout areas that are more easily accessibly in the woods that will still attract deer. This will lead to less stress on your body and when successful, you have an easier drag!
Use technology to your advantage. Using hunting apps and maps such as HuntWise, OnX or HuntStand, can help give you an idea of the terrain you will be exposed to prior to entering the woods. It will be easier to map out a less strenuous approach into the woods and minimize the load you place on your body.
Remember, hunting should be fun! Pain from poorly fitted and improperly maintained equipment and clothing can be avoided with good planning. Moreover, injury and death from inactivity and poor fitness is also preventable.
Visit your doctor regularly and listen to your body. Keep moving, eat healthy foods, exercise regularly, and live long and well!
EVERY MONDAY – Read Dr. Paul J. Mackarey “Health & Exercise Forum!” via Blog
EVERY SUNDAY in "The Sunday Times" - Read Dr. Paul J. Mackarey “Health & Exercise Forum!” in hard copy
This article is not intended as a substitute for medical treatment. If you have questions related to your medical condition, please contact your family physician. For further inquires related to this topic email: drpmackarey@msn.com
Paul J. Mackarey PT, DHSc, OCS is a Doctor in Health Sciences specializing in orthopedic and sports physical therapy in Scranton and Clarks Summit. Dr. Mackarey is in private practice and is an associate professor of clinical medicine at Geisinger Commonwealth School of Medicine. For all of Dr. Mackarey's articles, visit our exercise forum!
While I normally do not address the topic of shoveling snow until January, considering recent weather events, I thought it might be valuable to present it sooner. Much has been written about the dangers of snow shoveling for your heart. However, while not fatal, low back pain is the most common injury sustained while shoveling snow. Heart attacks are also more common following wet and heavy snow.
Snow shoveling can place excessive stress on the structures of the spine. When overloaded and overstressed, these structures fail to support the spine properly. The lower back is at great risk of injury when bending forward, twisting, lifting a load, and lifting a load with a long lever. When all these factors are combined simultaneously, as in snow shoveling, the lower back is destined to fail. Low back pain from muscle strain or a herniated disc is very common following excessive snow shoveling.
Snow Shoveling as a Form of Exercise:
GOOD - For the Young and Healthy – studies show that snow shoveling for 15 minutes is considered moderate physical activity and extreme and vigorous physical activity when performed more than 15 minutes even for young healthy college students.
BAD – For the Older and Unfit – research clearly shows that there is a significant increase in heart attacks among snow shovelers. If you have any risk factors or medical condition and do not exercise regularly consult your physician.
Cold Weather – makes this activity even more difficult and physically stressful. Cold air makes breathing more labored and difficult and cold temps create added strain on the body.
People at High Risk of Illness Due to Snow Shoveling:
History of Heart Attack
History of Heart Disease
History of High Blood Pressure or High Cholesterol
Smokers
Inactive & Sedentary Lifestyle
Overweight
Elderly
10 TIPS FOR SAFE SNOW SHOVELING:
MEDICAL CLEARANCE: If you have any medical condition or risk factors consult your physician.
PAIN: Stop immediately if you experience any pain. Especially in the chest, left arm, jaw, face, neck, or lower back.
ERGONOMICS: Choose a snow shovel that is right for you:
An ergonomic shovel with a curved handle allows you to keep your back straighter or arched when shoveling
An ergonomic shovel with a shorter or adjustable handle length allows you to keep your back straighter and knees bent when shoveling. The right handle length allows you to arch your back 10 degrees with your knees slightly bent when the shovel is on the ground.
A plastic shovel blade is lighter than a metal one and will be better for your spine.
A smaller blade is better than a larger blade. It may take longer but will stress your back less.
PUSH: When possible, push the snow. Do not lift it. Lifting is much more stressful on the spine. You can find shovels that are ergonomically designed just for pushing snow.
WARM – UP: Be sure your muscles are warm before you start to shovel. Cold and tight muscles are more likely to strain than warm, relaxed muscles. Layer and consider compression shirts or tights can help prevent cold and tight muscles.
LEVERAGE: When you grip your shovel, spread your hands at least 12 inches apart. This will improve your leverage and reduce strain on your lower back.
TECHNIQUE: Shoveling technique is very important. The American Academy of Orthopaedic Surgeons recommends:
Squat with your legs apart, knees bent and back straight.
Lift with your legs. Do not bend at the waist.
Scoop small amounts of snow into the shovel and walk when you want to dump it.
Do not hold the filled shovel with outstretched arms.
If snow is deep, remove in piecemeal, a few inches at a time.
Rest and repeat as necessary.
Move your feet and do not twist your back as you shovel or dump. Never throw snow over your shoulder
CAUTION: Be cautious shoveling wet snow. One full shovel can weigh 25 pounds.
Shovel wet snow slowly in piecemeal.
PACE YOURSELF: Take frequent breaks and stretch your back in the opposite direction of shoveling. For example: 1. Lean backwards and extend your lower back. 2. Pinch your shoulder blades together.
TECHNOLOGY:
Snow Blower - Use a self-propelled snow blower. It will put much less stress on your lower back than shoveling snow if used correctly. For example, push the blower with your legs and keep your back straight or arched and knees bent.
Ergonomic Shovels:
2 Handle Shovels: ErgieShovel or Snow Joe Shovelution
Push Shovels: Garant Yukon or Garant Sleigh Shovel
Snow Melting Alternatives:
www.warmlyyours.com - WarmlyYours - HeatTrak® portable snowmelting system for roofs, gutters, driveways, sidewalks, stairs and handicapped ramps uses electric mats or runners for home or office which can be customized.
Sources: The Colorado Comprehensive Spine Institute; American Academy of Orthopaedic Surgeons
Visit your doctor regularly and listen to your body.
EVERY MONDAY – Read Dr. Paul J. Mackarey “Health & Exercise Forum!” via Blog
EVERY SUNDAY in "The Sunday Times" - Read Dr. Paul J. Mackarey “Health & Exercise Forum!” in hard copy
This article is not intended as a substitute for medical treatment. If you have questions related to your medical condition, please contact your family physician. For further inquires related to this topic email: drpmackarey@msn.com
Paul J. Mackarey PT, DHSc, OCS is a Doctor in Health Sciences specializing in orthopedic and sports physical therapy in Scranton and Clarks Summit. Dr. Mackarey is in private practice and is an associate professor of clinical medicine at Geisinger Commonwealth School of Medicine. For all of Dr. Mackarey's articles, visit our exercise forum!
Recently, two patients asked me when I thought it would be safe for them to return to their exercise programs after abdominal surgery. She stated that she was not sure how to properly and safely implement or return to her program.
This column will attempt to ensure a safe return to activity and exercise following general surgery such as gall bladder, appendix, hernia, etc. The post-operative patient has many questions: When is it safe to begin an exercise program? How do I begin? What is the best exercise? Which exercises are best? How do I know if the activity is too intense or not intense enough? Are there safe guidelines?
Medical Clearance
Before you begin, discuss your intention to exercise with your surgeon and primary care physician. Get medical clearance to make sure you can exercise safely. With the exception of short daily walks, don’t be disappointed if your surgeon requires you to wait at least until your 6 week post-op check-up to begin exercise.
Time for a Standard Work-out
While a 60 minute workout would be the long term goal, begin slowly at 15-20-30 minutes and add a few minutes each week. Make time to warm up and cool down.
Warm-up 5-10 minutes
Strength Training 10-15-20 minutes
Aerobic 10-15-20 minutes
Cool down 5-10 minutes
Exercise Routine
If the individual does not exercise regularly, start slowly and then increase activity level
Importance of exercising in comfortable temperatures
Example: in the summer if exercising outside --- recommendation: early morning or late evening NOT during the middle of the day in the summer heat
Hydration before, during, and after exercise is important
Cellular Phone – for emergencies - take to hotel gym – especially if unattended
Warm Up
5-10 minutes
Ways to warm up:
Walking on a treadmill / around gym area
Bike
Stretching – active and gentle
Strength Training – begin with light weights and increase repetitions
20 minutes
Can begin with one set of 8 to 12 reps
2-3 times a week (do not exercise the same muscles 2 days in a row)
Exercises (Perform 8-10 different exercises that train all major muscle groups)
Shoulders – Bent over row with weights
Back – Seated rows with bands or bent over with weights
Chest – Chest press with weights or Push-ups
Biceps – Biceps curl with weights
Triceps – Triceps extensions with weights or Push-ups
Abdominals – pelvic tilts or core exercises on ball
Gluteals – Leg Press, 30 degree Wall Slides
Quadriceps – Knee extensions with ankle weights, Lunges, Squats
Hamstrings - Hamstring Curl
Calves – Calf raises
Aerobic
20 minutes
Exercise
Treadmill / walking outside
Elliptical
Bike (recumbent bike is recommended)
Stepper
Stairmaster
Cool Down
5-10 minutes
Walking on a treadmill / around gym area
Bike
Stretching
How to Monitor Your Exercise Program:
Target Heart Rate
First, determine your resting heart rate by taking your HR (pulse) using your index finger on the thumb side of your wrist for 30 seconds and multiply it by two. 80 beats per minute is considered a normal HR but it varies. This is a good baseline to use as a goal to return to upon completion of your workout. For example, your HR may increase to 150 during exercise, but you want to return to your pre exercise HR (80) within 3-5 minutes after you complete the workout.
For those who are healthy, calculating your target heart rate (HR) is an easy and useful tool to monitor exercise intensity.
220 – Your Age = Maximum Heart Rate
EXAMPLE for a 45 year old: 220 – 45 = 175 beats per minute should not be exceeded during exercise.
Metabolic Equivalent (MET) Intensity for Exercise - Energy Cost of Physical Exercise.
For those concerned about calories expended during exercise.
NOTE: Keep the level at a light/moderate level for the first four to six weeks and advance to the moderate/heavy at week six. The Very Heavy Level may not be appropriate for 12 weeks post op is for those who have a reasonable fitness level and exercise 4-5 days per week.
Example of Data Found on Fitness Equipment
Remember, this is only accurate if you program your correct height, weight and age.
Level kCal/min MET
Light 2 - 4.9 1.6 – 3.9
Moderate 5 - 7.4 4 – 5.9
Heavy 7.5 - 9.9 6 - 7.9
Very Heavy 10 - 12.4 8 – 9.9
Cardiac Patient on Beta Blockers
Always secure physician approval before engaging in an exercise program. If the patient is on beta blockers (Atenolol, Bisoprolol, etc), it is important to use the Borg Rating of Perceived Exertion Scale (RPE) scale to determine safe exercise stress since exercise will not increase HR as expected:
Borg (RPE) Scale = indicates exercise intensity
0 - Nothing at all 1 - Very light 2 - Light 3 - Moderate 4 - Somewhat intense 5 - Intense (heavy) 6 7 - Very intense 8 9 - Very, very intense 10 - Maximum Intensity
NOTE: Keep the RPE at 2-3 the first 6 weeks post op and advance to level 3-4 at 8-12 weeks post op. Levels 5-6-7 are for those with a reasonable fitness level and exercise 4-5 days per week. The advanced levels should not be attained until 2-3 months of exercise and 3-4 months post op.
MEDICAL CONTRIBUTOR: Timothy Farrell, MD, is a general surgeon at GCMC.
EVERY MONDAY – Read Dr. Paul J. Mackarey “Health & Exercise Forum!” via Blog
EVERY SUNDAY in "The Sunday Times" - Read Dr. Paul J. Mackarey “Health & Exercise Forum!” in hard copy
This article is not intended as a substitute for medical treatment. If you have questions related to your medical condition, please contact your family physician. For further inquires related to this topic email: drpmackarey@msn.com
Paul J. Mackarey PT, DHSc, OCS is a Doctor in Health Sciences specializing in orthopedic and sports physical therapy in Scranton and Clarks Summit. Dr. Mackarey is in private practice and is an associate professor of clinical medicine at Geisinger Commonwealth School of Medicine. For all of Dr. Mackarey's articles, visit our exercise forum!
Like many of you, I have always enjoyed the outdoors...walking, running, biking, hiking etc. However, recently, I have been more concerned about being safe, (getting older and more cautious, distracted drivers) when doing these activities on the side of the road.
Almost 15 percent of all motor vehicle injuries to people happened to those not in cars but while walking, running or hiking, so one needs to be safe. In fact, over 4,000 walkers or runners were fatally hit by a motor vehicle according to the Centers for Disease Control (CDC). These statistics continue to increase as the number of distractions to drivers increases (phone calls, texts, etc). Consequently, walkers, runners and cyclists must be more aware than ever to prevent injury from motor vehicles and stay safe.
Five high risk factors for walkers, runners and cyclists:
After dark
At rush hour in high traffic
Walk or run “with” instead of “into” traffic flow
More than one other person with you
Headphones
“Runner’s World” offers the following recommendations to stay safe:
Leave word. Tell somebody or leave a note at home about where you plan to go and how long you plan to be out. That way your loved ones will know to come look for you if needed.
Protect yourself: If your route is in a high crime area, avoid dawn and dusk, carry self-defense spray, exercise with a partner, leave jewelry at home and vary your route and routine.
Identify yourself. Run with proper ID, and carry a cell phone with emergency contacts taped to its back.
Pretend you're invisible. Don’t assume a driver sees you. In fact, imagine that a driver can’t see you, and behave accordingly.
Face traffic. Except for cyclists, walking and running “into” oncoming traffic is best. It’s easier to see, and react to, oncoming cars. And cars will see you more clearly too.
Make room. If traffic gets heavy, or the road narrows, be prepared to move onto the sidewalk or shoulder of the road. When walking or running into traffic, stay as far left as possible. When biking, favor the far right side of the road.
Be seen. Wear high-visibility, brightly colored clothing. When out near or after sunset, reflective materials are a must. (If you don't own reflective clothing, a lightweight reflective vest is a great option.) And use a headlamp or handheld light so you can see where you're going, and drivers can see you. The light should have a bright LED (drivers see blinking red as a hazard).
Unplug your ears. Avoid using iPods or wearing headphones—you need to be able to hear approaching vehicles. If you do use headphones, do so with the volume low and just one earbud in.
Watch the hills. When they crest hills, drivers' vision can suddenly be impaired by factors like sun glare or backdrops.
Beware of high-risk drivers. Steer clear of potential problem areas like entrances to parking lots, bars, and restaurants, where there may be heavy traffic.
Watch for early birds and night owls. At odd hours be extra careful. Early in the morning and very late at night, people may be overtired and not as attentive.
Mind your manners. At a stop sign or light, wait for the driver to wave you through—then acknowledge with your own polite wave. That acknowledgement will make the driver feel more inclined to do it again for the next walker or runner. Use hand signals (as you would on a bicycle) to show which way you plan to turn.
CYCLISTS -
Stay on the right and obey traffic rules.
Wear a helmet
Use hand signals when turning
Wear visible clothing and have reflectors on your bike
Carry a tire patch and first aid kit
Maintain your bike
Watch for pedestrians, parked cars, loose gravel and cracks and potholes.
Visit your doctor regularly and listen to your body.
EVERY MONDAY – Read Dr. Paul J. Mackarey “Health & Exercise Forum!” via Blog
EVERY SUNDAY in "The Sunday Times" - Read Dr. Paul J. Mackarey “Health & Exercise Forum!” in hard copy
This article is not intended as a substitute for medical treatment. If you have questions related to your medical condition, please contact your family physician. For further inquires related to this topic email: drpmackarey@msn.com
Paul J. Mackarey PT, DHSc, OCS is a Doctor in Health Sciences specializing in orthopedic and sports physical therapy in Scranton and Clarks Summit. Dr. Mackarey is in private practice and is an associate professor of clinical medicine at Geisinger Commonwealth School of Medicine. For all of Dr. Mackarey's articles, visit our exercise forum!
Antibiotic resistance occurs when bacteria no longer respond to the drugs designed to kill them. For more than a decade, the Centers for Disease Control along with other national and international agencies has supported an initiative called “Antibiotic Stewardship” the hallmark of which is the judicious, appropriate use of antimicrobials.
What’s The Problem?
It’s told in some sobering statistics from the CDC, World Health Organization, and Food and Drug Administration:
About 30-50% of antibiotics are misused concerning indication, duration of therapy, or choice of agent
More than 2.8 million antimicrobial-resistant infections occur in the U.S. each year, and more than 35,000 people die as a result
Antibiotic resistance costs $55 billion per year - $20 billion in excess healthcare costs + $35 billion in loss of productivity
Antibiotics cause 1 out of 5 emergency department visits for adverse drug events each year
No novel (brand new) antibiotics classes have been approved since 2019
The research pipeline for novel antibiotics is lacking – impairing progress in treating resistant bacterial species
If resistance continues on its present trajectory, 10 million deaths worldwide are predicted by 2050
Patients and providers must take equal responsibility. When we get sick, we often feel we need an antibiotic right away. In fact, we often demand one. A study published in the New England Journal of Medicine in 2018 found that to achieve a patient satisfaction rating in the 90th percentile physicians needed to prescribe antibiotics 75% of the time. Is this the correct approach to therapy? Are we using antibiotics too readily? What are the consequences of profuse antibiotic use?
Here's a pop quiz:
In which of the following situations are antibiotics warranted?
A. Cold symptoms (runny nose, sore throat, headache) with a fever of 101F for 2 days
B. Cold symptoms lasting 12 days with persistent stuffiness and headache
C. Cold symptoms for 3 days with yellow-green mucous discharge
D. all of the above
The correct answer is B. Let’s discuss the reasons. Symptoms experienced as part of the common cold can include green/yellow sputum, cough, runny nose, stuffiness, sore throat, headache, fever, and mild muscle aches. This illness is caused by a virus, most likely a rhinovirus. Currently, 160 identified strains of rhinovirus are know.
Antibiotics work to destroy bacteria, not viruses since they have no activity against viruses. Antibiotics target specific bacterial structures or functions. Common bacterial targets for antibiotics include the cell wall (amoxicillin), ribosome activity (azithromycin), and bacterial DNA (levofloxacin). All of those are lacking in the very primitive structure of a virus. So, you could sit in a bathtub full of penicillin and not cure your cold with an antibiotic because there is simply nothing for the antibiotic to destroy in the viral structure.
Why are antibiotics appropriate after 10 days with cold symptoms? The typical common cold lasts between five and ten days with symptoms peaking around three or four days and waning at day six. If symptoms are consistent or regress and then become worse it is likely a sign of bacterial superinfections (super = on top of).
How Does This Happen?
Usually, we carry certain bacteria with us as part of our “normal flora”. The mouth, nasal passages, large intestines, and skin host the most bacteria in the body. These bacteria work with our body and provide various “services” including protection against other more dangerous bacteria, digestion of food, and production of vitamins. A viral infection disturbs the normal balance of bacteria, allowing for proliferation and subsequent bacterial infection.
Side Effects:
Why should we be careful about antibiotic use?
Antibiotics are not innocuous substances. They have significant side effect profiles. Adverse drug reactions associated with antibiotics can be less severe and consist of mild rash or nausea. More serious reactions include heart arrhythmias, tendon rupture, Stevens Johnson Syndrome (severe skin rash resembling thermal burns), and liver and kidney damage. Remember – every drug – not only antibiotics – has the potential to cause unpredictable adverse reactions
Resistance:
The most compelling reason to be careful about antibiotic use is resistance. Each time bacteria are exposed to an antibiotic, some are destroyed but others adapt to resist the antibiotic and live to see another day (remember Darwin’s Survival of the Fittest?). Antibiotics are unique in that the more they are used, the less effective they become. When antibiotics are used inappropriately – not taking them on schedule, for the right duration, taking them for a viral illness – bacteria have a chance to adapt to overcome the antibiotic activity. The resistant bacteria may go on to set up a resistant infection in you or that bacteria may be transmitted to others.
Limiting Risk:
There are several ways we can combat this problem according to the Joint Commission on Healthcare Accreditation 2020 Standards. It is important to identify the causative agent if possible.
For example, a sore throat should not be treated with antibiotics until a throat culture or rapid strep test is obtained and a bacterial cause is identified. According to the Infectious Disease Society of America, 90 percent of adult sore throats have a viral cause, not bacterial. Avoid unneeded clinic or urgent care visits and utilize OTC and non-drug measures to manage non-bacterial infection symptoms.
Re-evaluate drug allergies:
Mislabeled allergy status leads to more expensive, less optimal antibiotic choices, more complex administration, increased resistance rates, and more treatment failures. The most common listed drug allergy in the US is Penicillin. According to the CDC, 10% percent of patients reports an allergy, however, < 1% of patients have a true allergy precluding penicillin or penicillin-like agents (the biggest class of antibiotic agents).
Vaccination:
Vaccines may prevent bacterial infections or prevent viral infections which will avert a bacterial superinfection. Here are two examples of where vaccines can lower antibiotic use. The pneumococcal “pneumonia” vaccine protects against the bacterium Streptococcus pneumoniae. Following the current guidelines for vaccination during childhood and adulthood decreases pneumococcal infections. According to the CDC, this vaccine has reduced pneumococcal infections by more than 90% in children. In addition, antibiotic-resistant pneumococcal infections have decreased in the United States since the pneumococcal vaccine was introduced.
The shingles vaccine also minimizes antibiotic use. The shingles vaccine “Shingrix”, is currently approved for individuals 50 years old (and older) as a two-dose series. Not only does it effectively prevent the occurrence of shingles, a painful, debilitating re-emergence of the chickenpox virus, but also reduces the risk of a potential secondary bacterial skin superinfection. Vaccine prevention of viral illness may subsequently eliminate antibiotic use.
Education:
Educating patients and prescribers will lead to the proper use of antibiotics to curb antibiotic resistance.
Guest Author: Dr. Gretchen Welby, PharmD, MHA
Dr. Welby received degrees from Keystone College and Philadelphia College of Pharmacy and Science. She received a Master of Health Administration Degree from the University of Scranton and a Doctor of Pharmacy degree from Temple University. She is currently the Academic Director of the Physician Assistant Program at Marywood University where she teaches Anatomy, Physiology, Pathophysiology, and Pharmacology.
EVERY MONDAY – Read Dr. Paul J. Mackarey “Health & Exercise Forum!” via Blog
EVERY SUNDAY in "The Sunday Times" - Read Dr. Paul J. Mackarey “Health & Exercise Forum!” in hard copy
This article is not intended as a substitute for medical treatment. If you have questions related to your medical condition, please contact your family physician. For further inquires related to this topic email: drpmackarey@msn.com
Paul J. Mackarey PT, DHSc, OCS is a Doctor in Health Sciences specializing in orthopaedic and sports physical therapy in Scranton and Clarks Summit. Dr. Mackarey is in private practice and is an associate professor of clinical medicine at Geisinger Commonwealth School of Medicine. For all of Dr. Mackarey's articles, visit our exercise forum!
What is an Ice Bath?
Ice baths have become a new trend or fad in health and fitness, especially among elite athletes and some celebrities. However, it is far from a new treatment modality. In fact, the Ancient Greeks employed cold-water immersion for fever, pain relief, relaxation and socialization. In addition, Hippocrates documented the use of cold for medicinal purposes for its analgesic benefits.
Ice baths, a type of cryotherapy, is also referred to as cold water immersion (CWI) or cold water therapy. This involves immersing your body in ice water for approximately 5-15 minutes from the neck down at 50-59 degrees. The ice baths are commonly used for pain, delayed-onset muscle soreness (DOMS), and inflammation and mood elevation.
In theory, the cold water lowers the temperature of your skin and body by vasoconstriction (narrow) of the blood vessels. When you get out of the cold, water the vasodilatation (widen) of the blood vessels. Immediately, this brings fresh oxygen and nutrient-rich blood back to the tissues to warm the body and in the process, reduce pain, inflammation and promote healing.
Types of Cold Water Therapy
Ice Bath/Cold Water Immersion (CWI) - immersing your body in ice water for approximately 5-15 minutes from the neck down at a temperature of 50-59 degrees.
Cold Showers – Standing under a cold shower at the coldest setting (as close to 50-59 degrees as possible) for 5-15 minutes. It is often recommended as a good introduction to CWI.
Contrast Water Therapy (Contrast Baths) – Alternating between soaking or showering in hot water for a period of time followed by cold water for the same time (3-5 minutes). The period of time is flexible as some studies suggest alternating hot and cold at one minute intervals.
Wim Hof Method – established by a Dutch athlete who recommends incorporating breathing techniques and meditation with CWI.
Purported Ice Bath Benefits
Pain Management – cold water therapy leads to vasoconstriction (narrowing the blood vessels) which can reduce swelling and inflammation associated with pain. Moreover, cold creates an analgesic effect to the skin to aide in pain control.
Reduces Muscle Soreness – cold water therapy has been found to reduce muscle soreness one hour after intense exercise including delayed-onset muscle soreness (DOMS0, however, strength was compromised following CWI. Moreover, it is important to note that studies showed heat therapy had similar results as CWI.
Improves Mood and Alertness – Some studies with small sample sizes have demonstrated that CWI improved self-esteem and alertness, reduced muscle tension, anger and nervousness. However, there was no difference soaking in 55 degree water verses 68 degrees for 18 to 20 minutes. Also, the studies were exclusively performed on healthy individuals.
Potential Side Effects of Ice Baths
If you have the following health conditions, ice baths may not be the best therapeutic modality for you. Before you consider trying an ice bath, consult with your physician to avoid potentially serious problems:
Cold Hives – itchy welts, swollen lips and throat when your skin comes in contact with something too cold.
Heart or Lung Conditions – when vasoconstriction of the blood vessels occurs from the cold, your heart rate and blood pressure increase dramatically. The excess strain on your heart can be dangerous, especially if you have compromised cardiopulmonary function. It can also lead to an irregular electrical rhythm (arrhythmia), which can be serious.
Raynaud’s Syndrome – lack of blood flow to the fingers and toes cause a hypersensitivity and cause them to turn white or blue. It can lead to tissue damage.
In Conclusion: What the Science Says
While some studies have shown that subjects report less muscle soreness following CWI when compared to rest, most studies suggest that the reported effects are placebo. Also, reports of improved circulation, reduced inflammation and improved recovery or performance has not been scientifically validated. In view of this, it is recommended that those considering the use of CWI for pain and inflammation management, reduced muscle soreness, and mood elevation, should consult their physician to determine if the potential risks are worth the purported benefits.
EVERY MONDAY – Read Dr. Paul J. Mackarey “Health & Exercise Forum!” via Blog
EVERY SUNDAY in "The Sunday Times" - Read Dr. Paul J. Mackarey “Health & Exercise Forum!” in hard copy
This article is not intended as a substitute for medical treatment. If you have questions related to your medical condition, please contact your family physician. For further inquires related to this topic email: drpmackarey@msn.com
Paul J. Mackarey PT, DHSc, OCS is a Doctor in Health Sciences specializing in orthopaedic and sports physical therapy in Scranton and Clarks Summit. Dr. Mackarey is in private practice and is an associate professor of clinical medicine at Geisinger Commonwealth School of Medicine. For all of Dr. Mackarey's articles, visit our exercise forum!